How To Transfer A Drawing To Wood
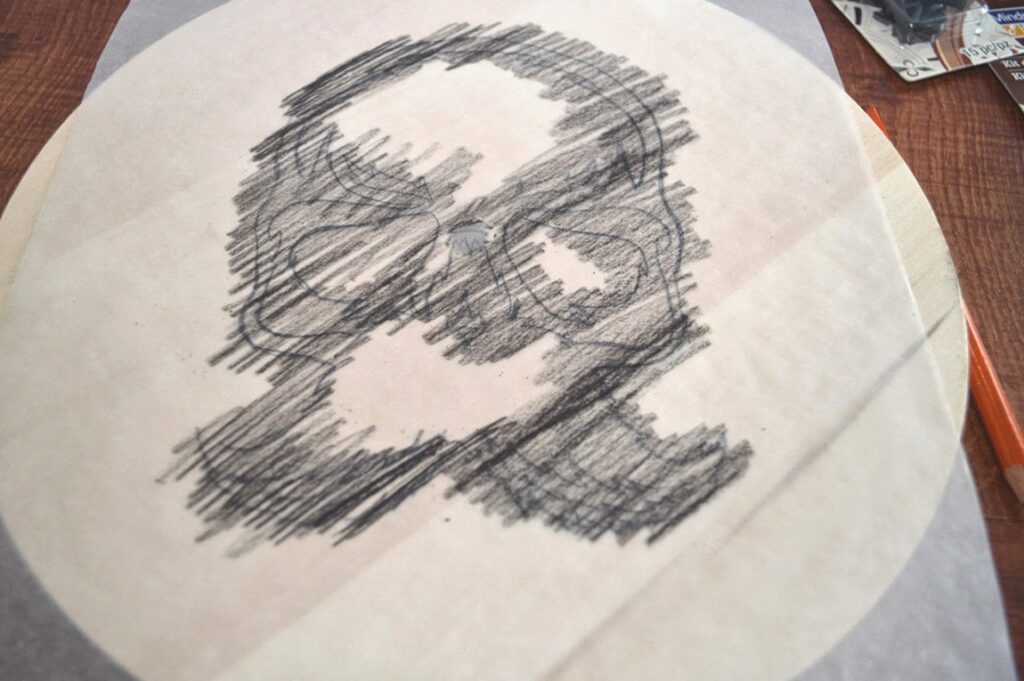
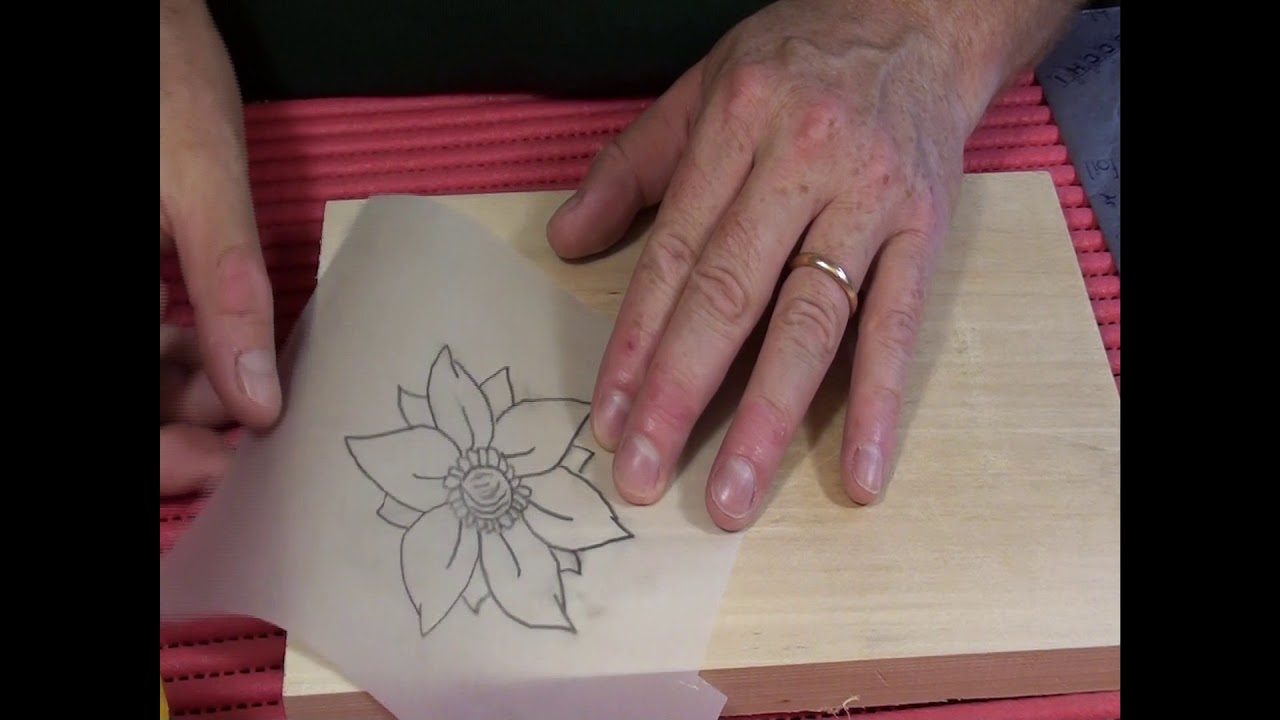
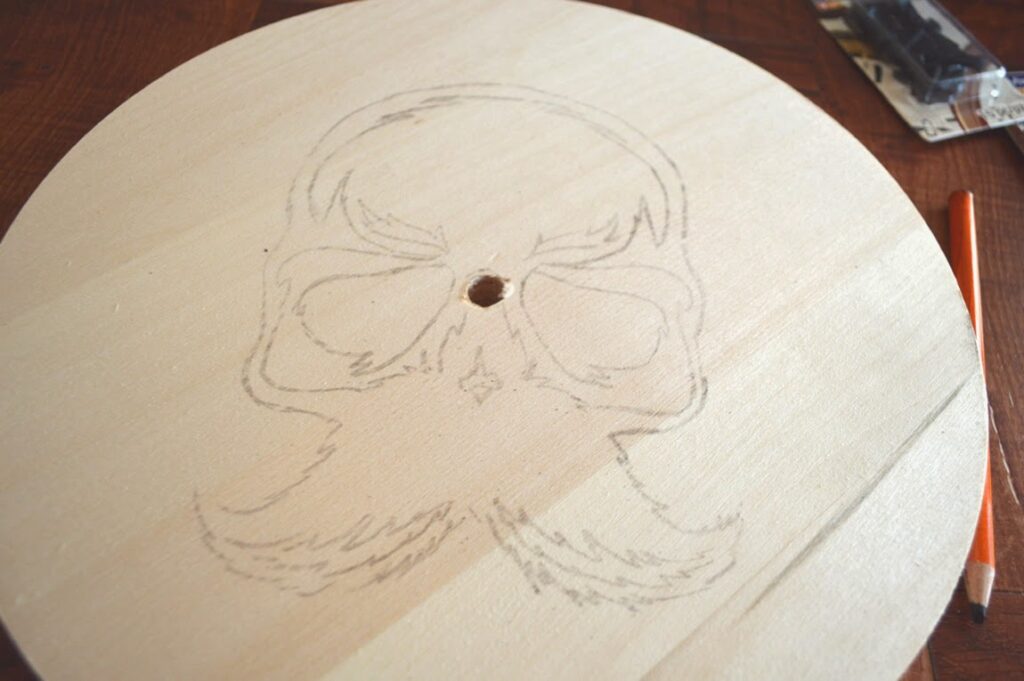
How To Transfer A Drawing To Wood - Gather materials you will need… piece of wood/ project surface sandpaper, 60 or 80 grit freezer paper (amazon. This is by far the easiest method! Hold it down and use a soft sponge or rag to rub the wax paper like you would make a print, and you will be delighted to see how beautifully the image got transferred onto the wood! Use decent pressure as you trace and make sure to go over all the details you want to be transferred onto the wood. Web how to transfer a design onto wood. Web how to transfer designs to your wood. Flip your design back over and secure it into. Start rubbing away the paper. I’ve done quite a few other image transfers in the past, including transferring words onto wood using just a pencil and some paint. Using a ballpoint pen, trace over the design very firmly. Gather materials you will need… piece of wood/ project surface sandpaper, 60 or 80 grit freezer paper (amazon. Start rubbing away the paper. All you need is your design, some chalk. Shake the excess chalk off the design. Web if you’re transferring right to the wood, as with the wax and freezer paper and blender marker methods, you can use. All you need is your design, some chalk. Web use scissors and cut the freezer paper to the letter size. Gather materials you will need… piece of wood/ project surface sandpaper, 60 or 80 grit freezer paper (amazon. Freezer paper (much more printer friendly than wax paper) 5. Start rubbing away the paper. Then, use a regular pencil and heavily shade over the. Web if you’re transferring right to the wood, as with the wax and freezer paper and blender marker methods, you can use more force with the burnisher. Freezer paper (much more printer friendly than wax paper) 5. Web today, i’m sharing a tutorial for how to transfer a graphic onto. This may take a while depending on how detailed your image is. Start rubbing away the paper. This is by far the easiest method! In this video i'll cover several methods on how design can be transferred on wood. I’ll show you 5 different ways to print on wood and. Web here is how to use vellum paper to transfer a pattern onto wood: Web acrylic gel medium is the stuff that will do the actual transfer of the ink. Method 1 uses a stylus to etch the design into your wood. Then, cut the excess white paper off around your. Web how to transfer designs to your wood. Web these days we typically draw the pattern on some paper and the trick is transferring the pattern to the wood. Web how to transfer step 1: Same as explained in the first method. This lesson shows different techniques of transferring your carving designs to wood. Flip your design back over and secure it into. I’ll show you 5 different ways to print on wood and. Web how to transfer a design onto wood. If you skip this step, the resulting transferred ink will not be properly absorbed into the wood and stay for a short while only. Use decent pressure as you trace and make sure to go over all the details you want. Web place a damp cloth down onto the back of the photo for several minutes. Web these days we typically draw the pattern on some paper and the trick is transferring the pattern to the wood. Start rubbing away the paper. I always use the gloss variety. Web today, i’m sharing a tutorial for how to transfer a graphic onto. Laserjet printer toner is plastic base. If you skip this step, the resulting transferred ink will not be properly absorbed into the wood and stay for a short while only. Then, use a regular pencil and heavily shade over the. Web instructions print out your design at the appropriate size needed for your wood. Web acrylic gel medium is the. Prep your transfer surface if using an isolated piece of wood (to create a sign or wall art), lighter colored. When you’re using the gel medium/gesso/paint techniques, just press down hard enough to flatten the image into the goop and get as many air bubbles out of the paper as you can. Web 0:00 / 16:53 how to transfer sketches. Web how to transfer step 1: Web today, i’m sharing a tutorial for how to transfer a graphic onto wood using wax paper! I cut my paper a little bit inside of my pencil lines. Paper cutter, or scissors and a ruler 4. Web how to transfer designs to your wood. Now all you need to do is use a marker pen or small paintbrush and begin to fill in the outlines or shapes of the image, and the transfer is done. Draw the pattern in reverse, go over it in soft pencil, put the pattern pencil side down on the wood and rub the paper. Web carefully trace over all the lines of your image to transfer it onto wood. If you skip this step, the resulting transferred ink will not be properly absorbed into the wood and stay for a short while only. Prep your transfer surface if using an isolated piece of wood (to create a sign or wall art), lighter colored. Web if you’re transferring right to the wood, as with the wax and freezer paper and blender marker methods, you can use more force with the burnisher. This is by far the easiest method! Shake the excess chalk off the design. Use decent pressure as you trace and make sure to go over all the details you want to be transferred onto the wood. After removing the top layer of paper, let dry a little and then repeat. Web place a damp cloth down onto the back of the photo for several minutes.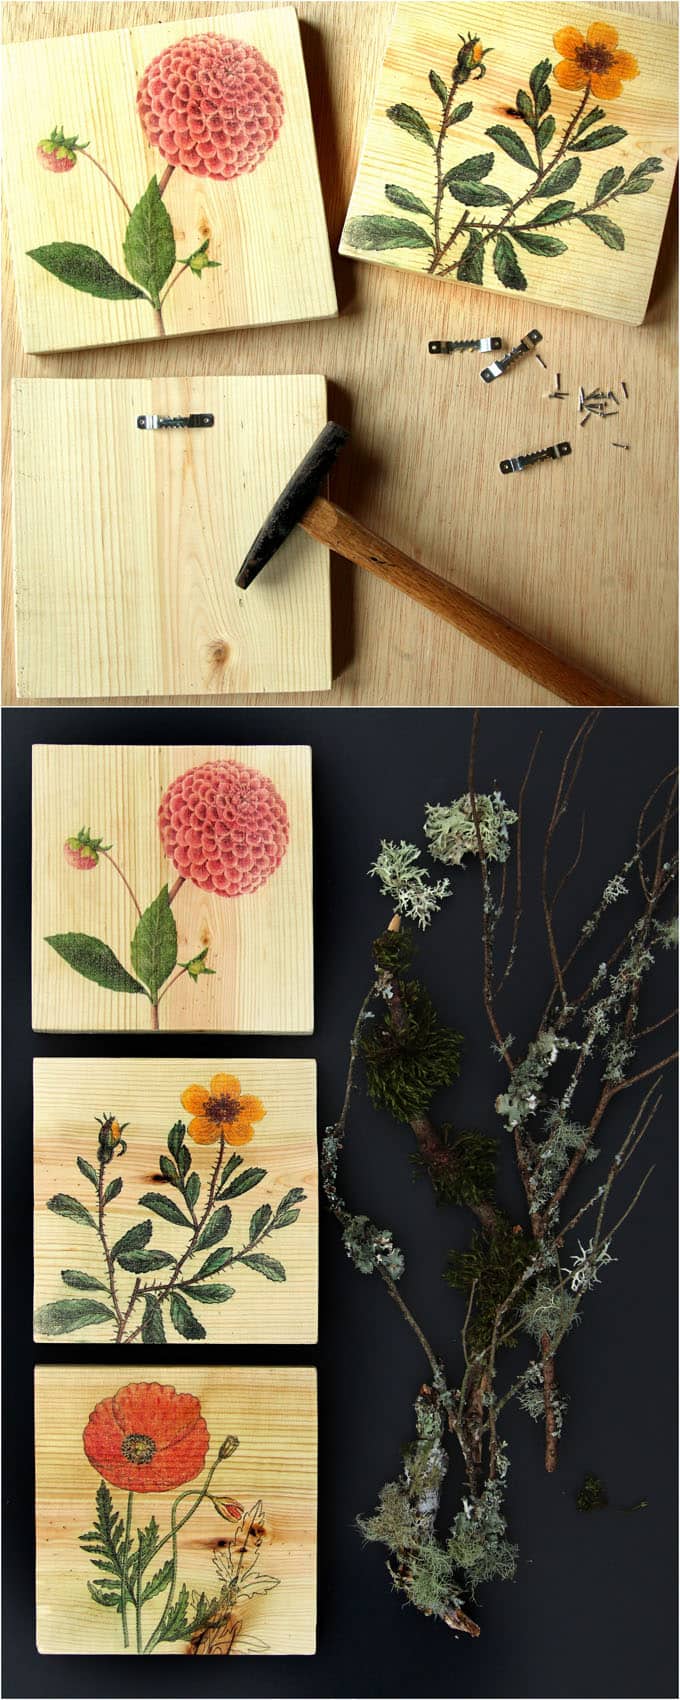
DIY Wall Art & How to Transfer Image to Wood A Piece Of Rainbow

How to transfer designs to your wood YouTube
60+ Easy DIY Picture Transfer Projects Styletic

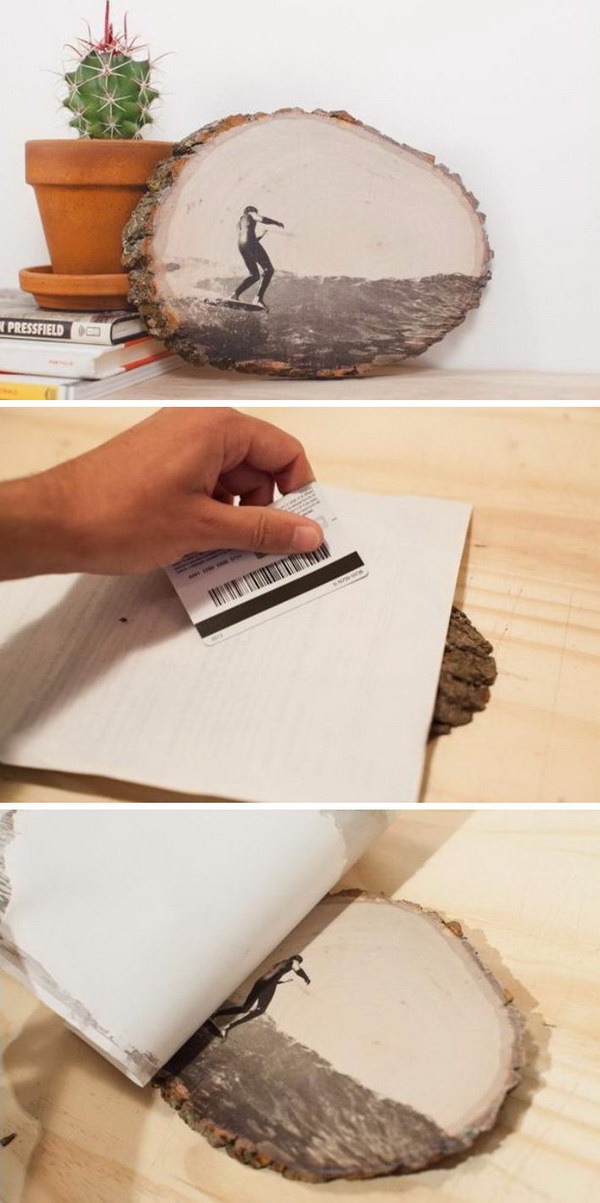
Image Transfer to Wood 10 Steps (with Pictures) Instructables

Learn how to easily transfer a design onto wood with just a pencil
DIY Basics How to Transfer an Image Outline onto Wood

How to Transfer a Design onto Wood Six Clever Sisters
Woodcarving How to transfer drawings on wood YouTube

Transfer Photos Wood Mod Podge Easy Trick Video Tutorial Mod podge on
DIY Basics How to Transfer an Image Outline onto Wood
Web Use Scissors And Cut The Freezer Paper To The Letter Size.
Printable Mirror Image Of What You Want To Transfer 6.
Hold It Down And Use A Soft Sponge Or Rag To Rub The Wax Paper Like You Would Make A Print, And You Will Be Delighted To See How Beautifully The Image Got Transferred Onto The Wood!
Cut Out The Pattern You Want Using Scissors Out Of Vellum Paper Identify The Area Where You Want The Pattern To Go To, Use Tape To Keep Vellum Paper In The Right Place If Your Surface Is Uneven, Use Multiple Pieces Of Tape For The.
Related Post: