Ray Diagram Drawer
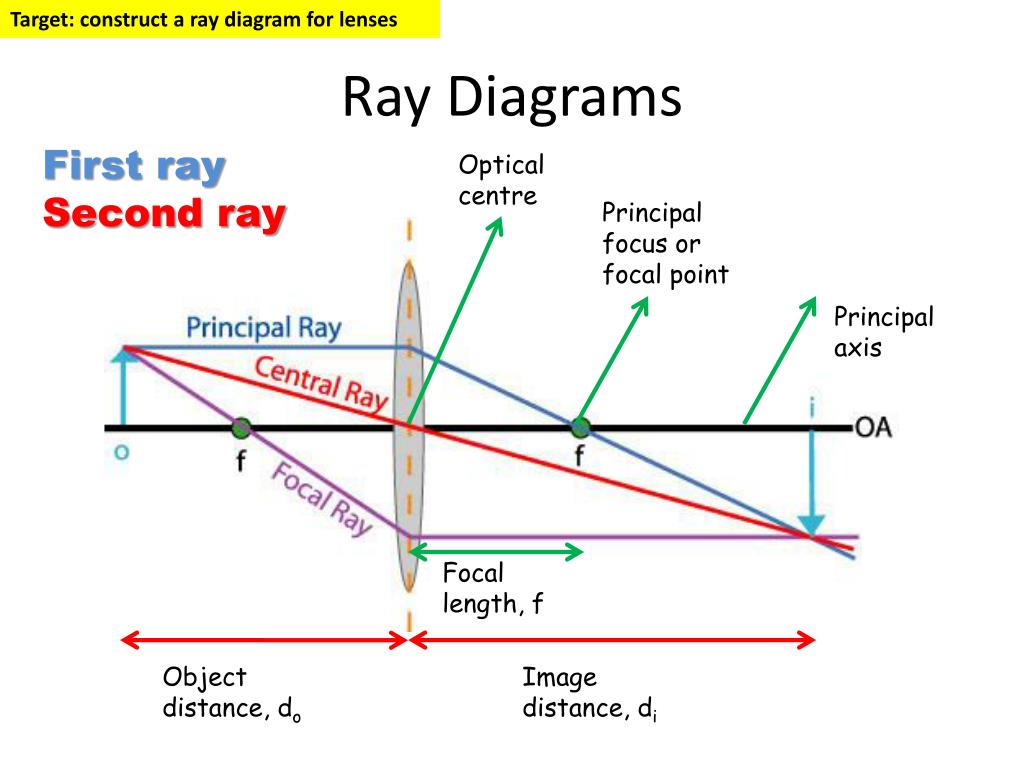
Ray Diagram Drawer - Web this simulation shows a ray diagram for a concave mirror. For implementing and testing how the formulae work. When you draw ray diagrams on the board or on a transparency: Source code is available on github. Web the four steps of the process for drawing a ray diagram are listed, described and illustrated below. All rays are drawn with a ruler. The rays parallel to the principal axis and the ray through the center of. F is the focal point. Web concave and convex mirror: This is often from a source or object to an observer or screen. Then we draw a dotted line from the left focal point to the lens. This is because light only travels in straight lines. Web the four steps of the process for drawing a ray diagram are listed, described and illustrated below. Web concave and convex mirror: There are a few important things to note: Also, an arrow on the tip of the ray shows the direction of propagation of light. Web eye to view the image of the object. Web for example, you can draw a ray of light parallel to the principal axis which reflects off the mirror and passes through the principal focus (like in this video). Draw the second ray such. Then we draw a dotted line from the left focal point to the lens. Source code is available on github. Web a ray of light is incident on a spherical mirror at the pole, p. This ray will refract parallel to the ground. This question hasn't been solved yet! Web how do you draw a ray diagram? Web first, we draw a dotted line from the tip of the object to the focal point on the opposite side. By manipulating the object and lens locations, you can create real or virtual images. How does a lens or mirror form an image? Also, an arrow on the tip of the. How does a lens or mirror form an image? A ray diagram must be drawn with a ruler, as all of the rays of light must be straight lines. Then we draw a dotted line from the left focal point to the lens. But also, you can draw a ray of light that passes through the principal focus (on its. Then we draw a dotted line from the left focal point to the lens. Then we draw a ray traveling in the direction of the dotted line. Draw the incident ray for light traveling from the corresponding extreme on. Examples are given for converging and diverging lenses and for the cases where the object is inside and outside the principal. Web first, we draw a dotted line from the tip of the object to the focal point on the opposite side. This question hasn't been solved yet! To show the refraction of a wave at a boundary. Web in this keipert labs tutorial, we'll go through how to draw and construct a ray diagram. Web for example, you can draw. The image formed by a single lens can be located and sized with three principal rays. Draw the image of the object. But also, you can draw a ray of light that passes through the principal focus (on its way to the mirror) and when it bounces off the mirror, it will travel parallel to the principal axis. Pick a. Check the check boxes to show the distances s o and s i. Light travels in straight lines within a uniform medium (this means that light can change direction upon entering a different medium). Web eye to view the image of the object. When you draw ray diagrams on the board or on a transparency: Web a ray of light. Then we draw a ray traveling in the direction of the dotted line. Draw the incident ray for light traveling from the corresponding extreme on. The rays parallel to the principal axis and the ray through the center of. Which of the following diagrams shows the reflected ray correctly? A ray diagram must be drawn with a ruler, as all. Then we draw a ray traveling in the direction of the dotted line. The rays parallel to the principal axis and the ray through the center of. Create & simulate 2d geometric optical scenes interactively. Web in this keipert labs tutorial, we'll go through how to draw and construct a ray diagram. Start with your pencil on the top of the object (black thick arrow tip) and draw a line parallel to the principle axis to the center of the lens. See how light rays are refracted by a lens or reflected by a mirror. Then follow it up with the concept checker. How does a lens or mirror form an image? Draw the image of the object. Draw a ray from the object to the lens that is parallel to the principal axis. Examples are given for converging and diverging lenses and for the cases where the object is inside and outside the principal focal length. Draw the second ray such that it travels exactly parallel to the principal axis. Observe how the image changes when you adjust the focal length of the lens, move the object, or move the screen. Using a straight edge, accurately draw one ray so that it passes exactly through the focal point on the way to the lens. This is often from a source or object to an observer or screen. Draw the incident ray for light traveling from the corresponding extreme on.How to Draw Ray Diagram (POWERPOINT)

How to draw ray diagrams // Convex lens ray diagrams // Class 10
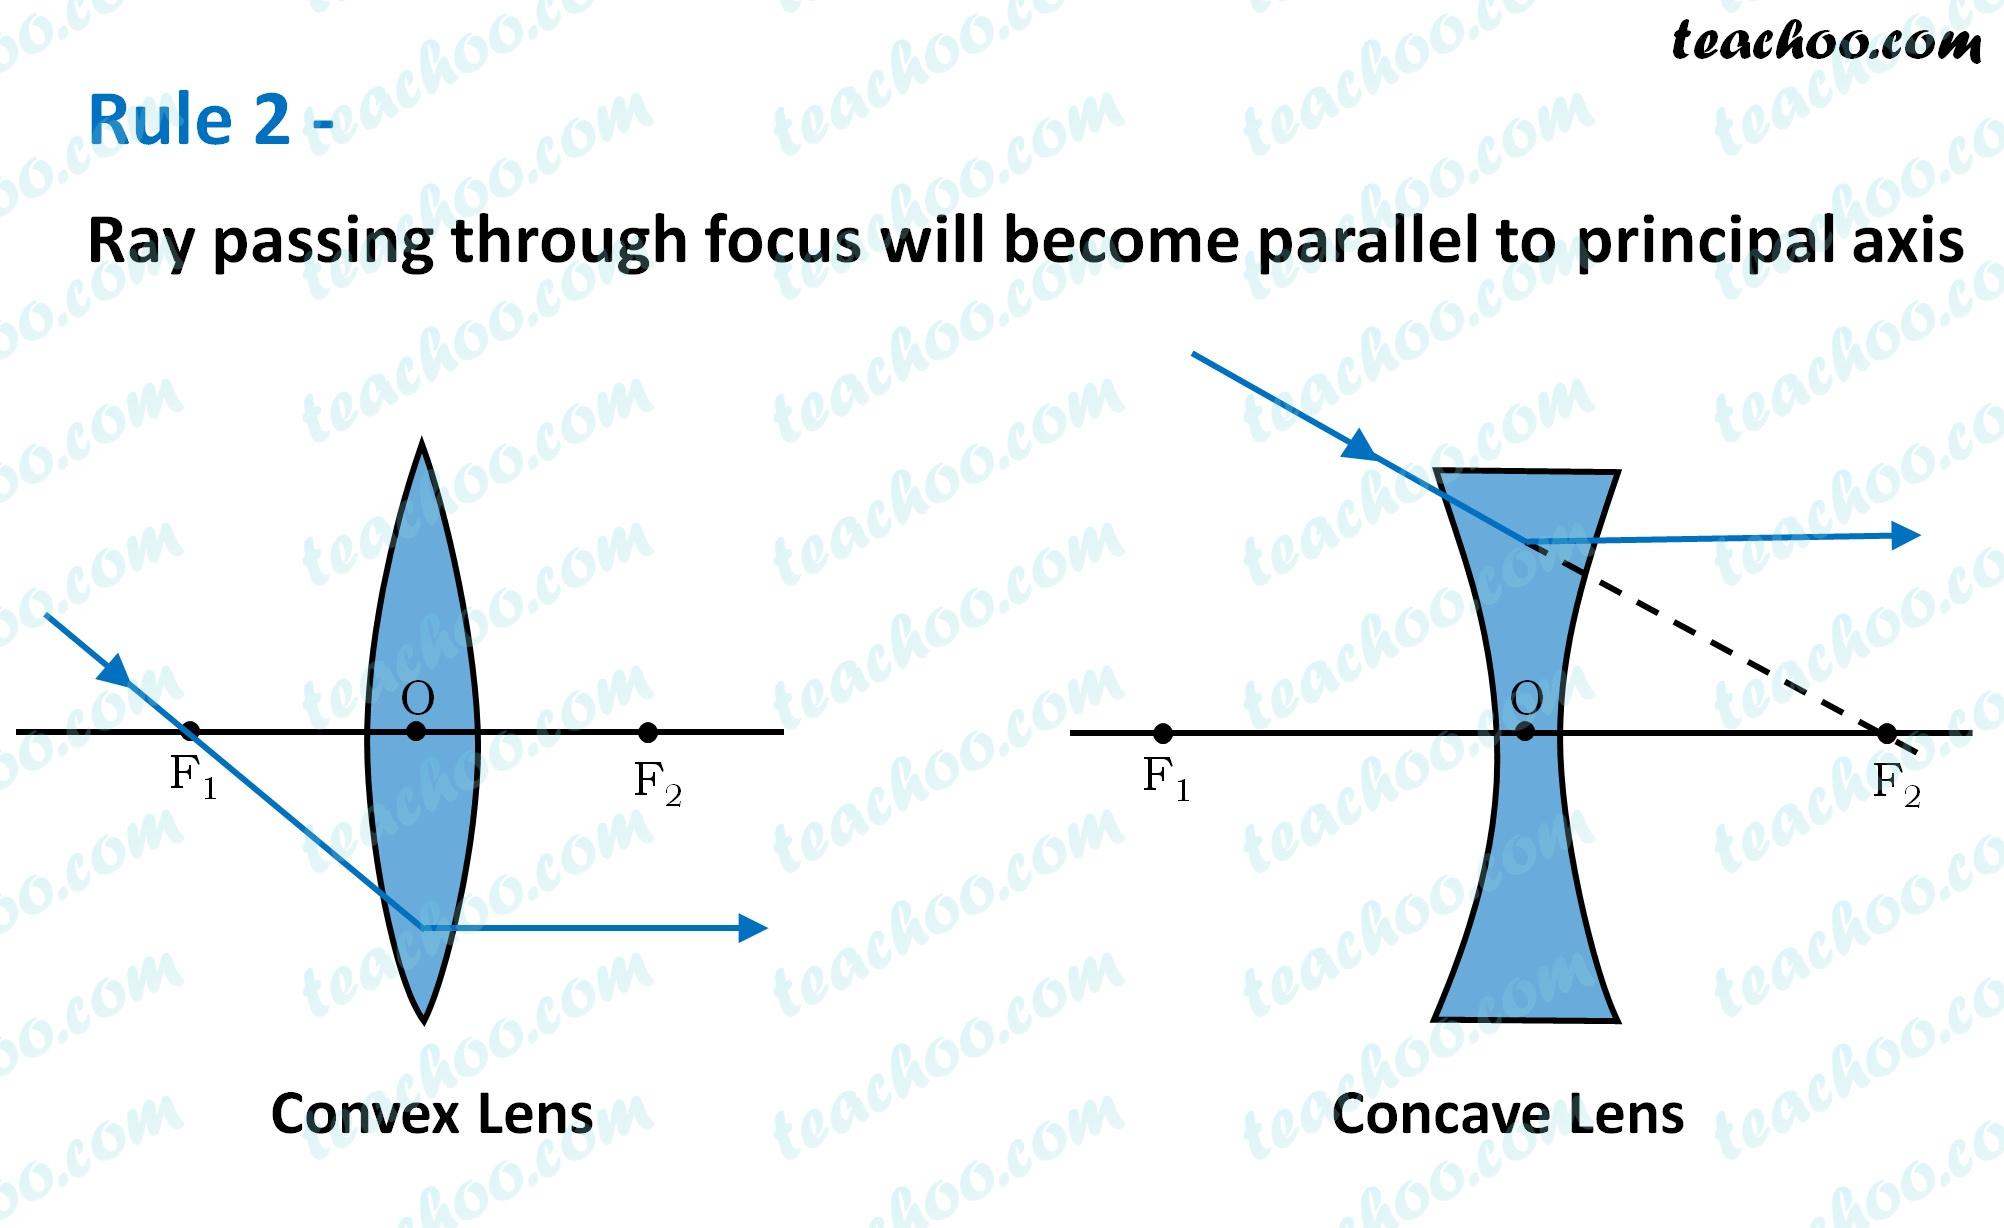
Rules for drawing Ray Diagram in Convex and Concave Lens Teachoo
Draw A Labelled Ray Diagram For Image Formation By A Concave Mirror

Rules for drawing Ray Diagram in Concave and Convex Mirror Teachoo
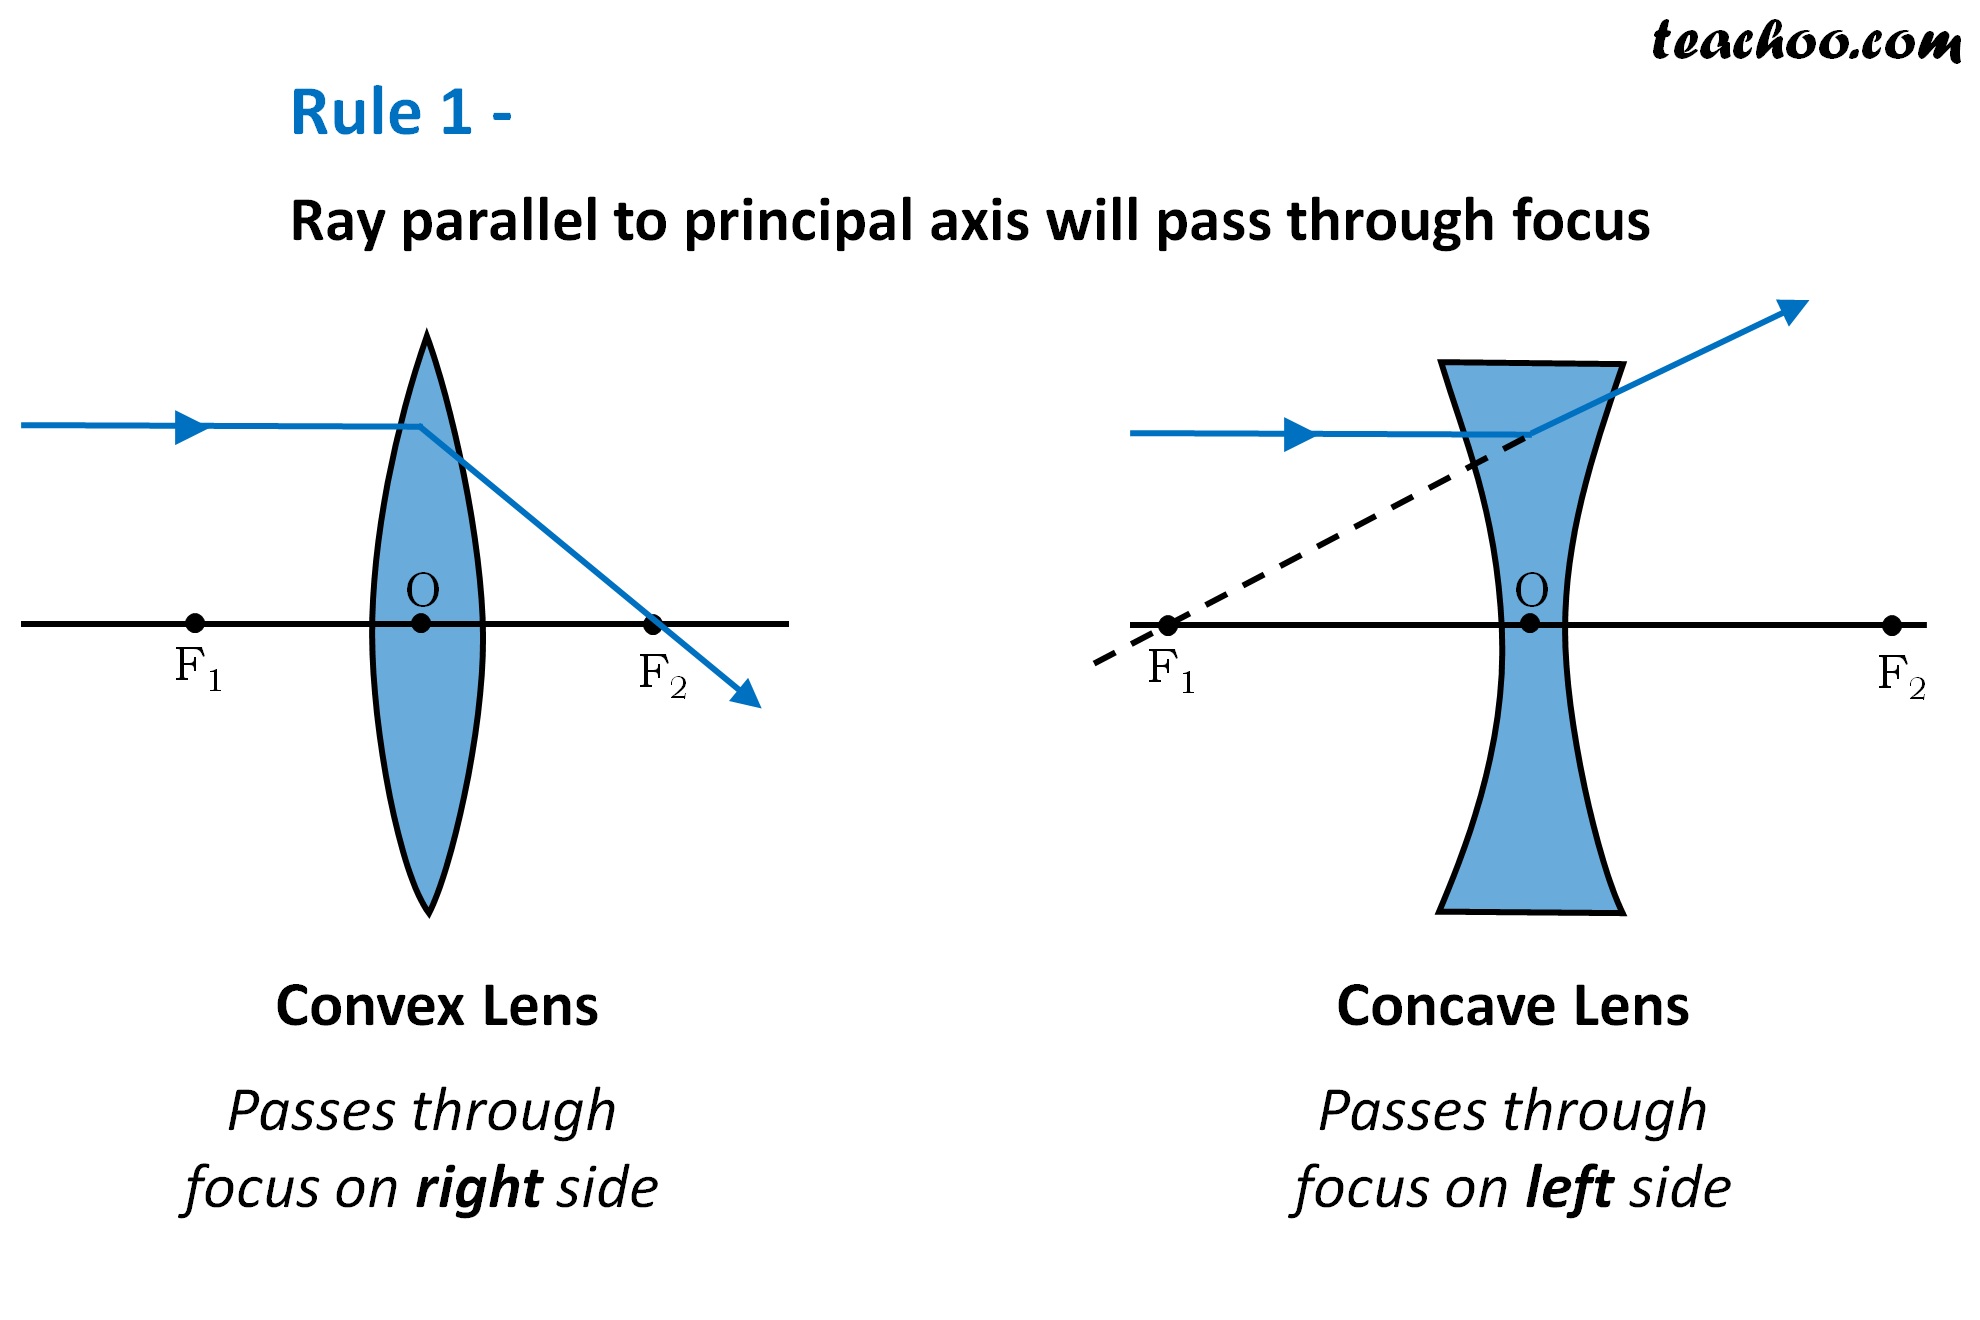
Rules for drawing Ray Diagram in Convex and Concave Lens Teachoo
.PNG)
Ray diagrams for convex mirrors
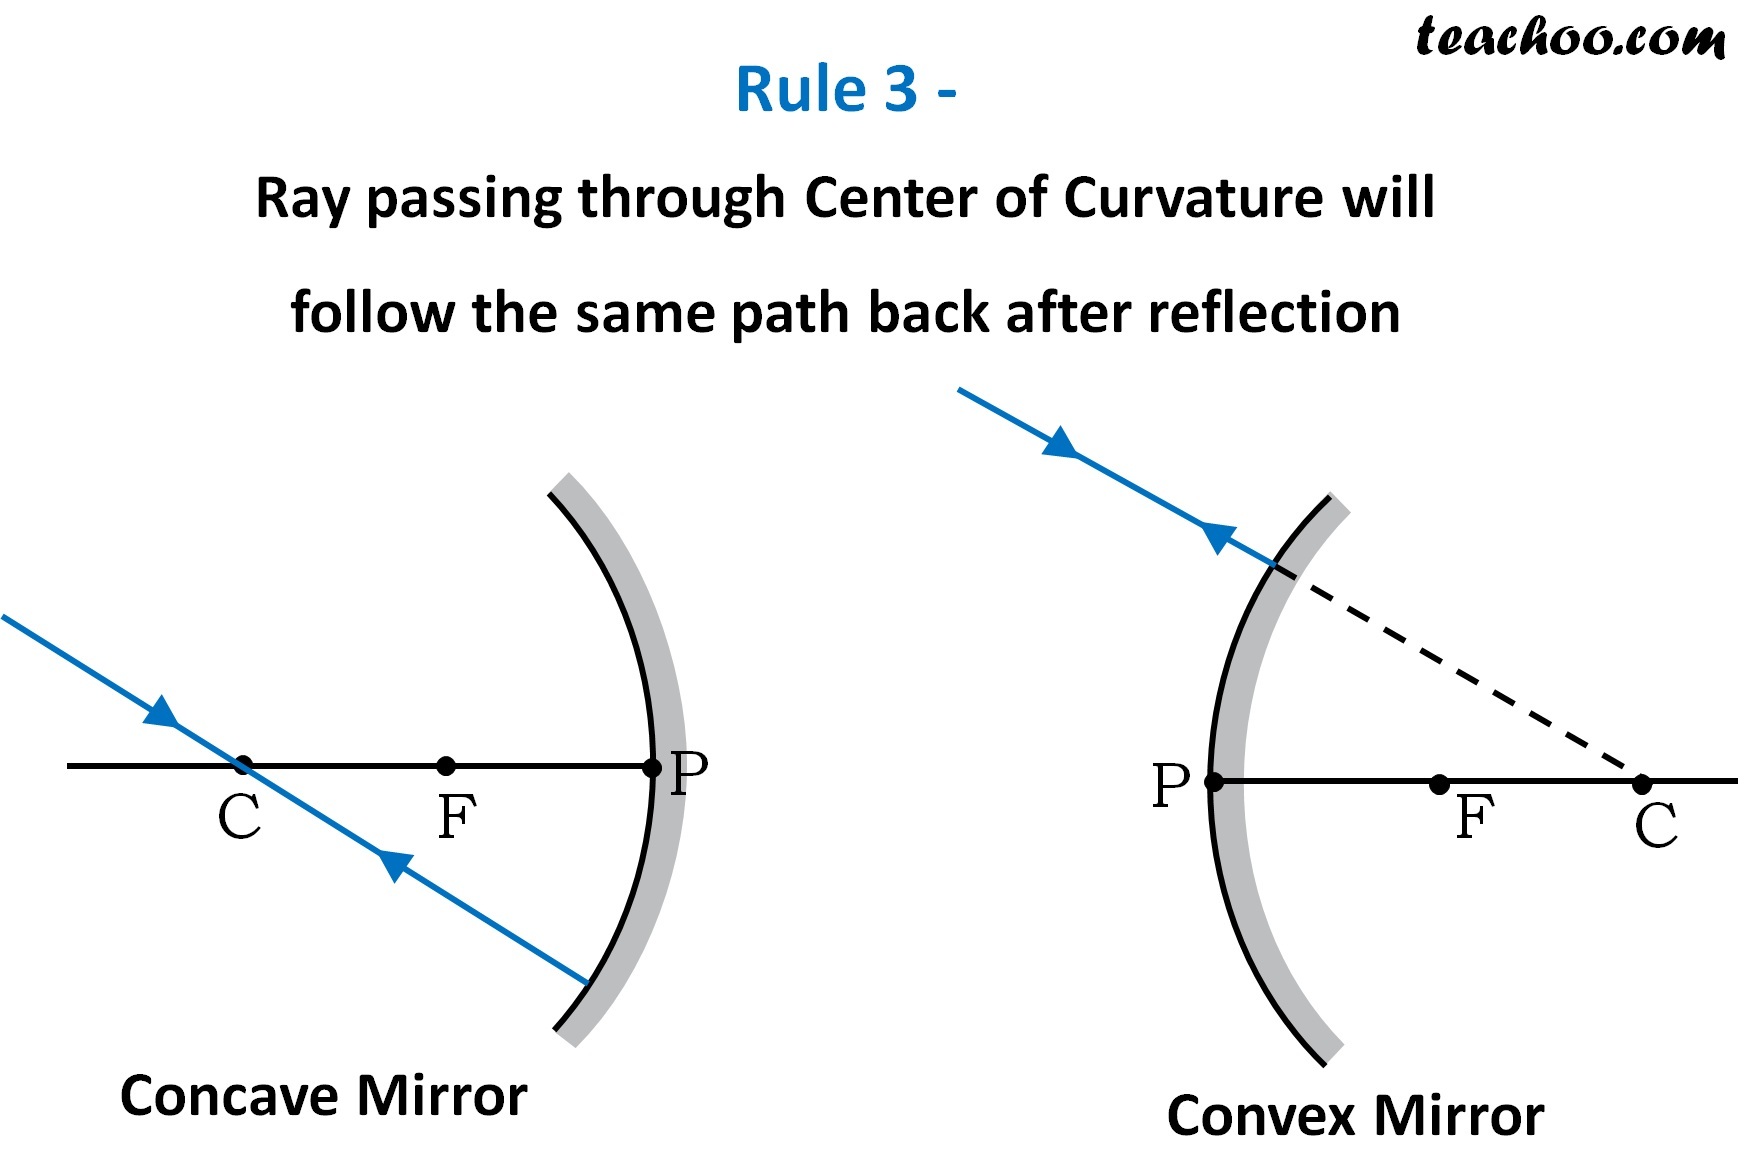
Rules for drawing Ray Diagram in Concave and Convex Mirror Teachoo

Draw a ray diagram for concave mirror when object

Convex Mirror Ray diagram, Images Formed with Steps Teachoo
To Draw A Ray Diagram:
Also, An Arrow On The Tip Of The Ray Shows The Direction Of Propagation Of Light.
This Is Because Light Only Travels In Straight Lines.
A Ray Diagram Must Be Drawn With A Ruler, As All Of The Rays Of Light Must Be Straight Lines.
Related Post:
